
How to Install the ZeroVPN application on MacOS.
You'd like to use the ZeroVPN application on your MacOS client?
Follow this guide to learn how!
To begin you need an Admin to invite you to their personal ZeroVPN space.
You'll receive an email which will prompt you to register on the platform.
Once you've access to the space, what you've to do now on your personal MacOS Client is to download the WireGuard app from the Apple Store.
When the installation is complete, open tha application and look for the '+' button in the bottom left corner of the app and click on it.

As shown in the image above, a drop-down menu appears. Click on 'Add Empty Tunnel' to create a new tunnel.
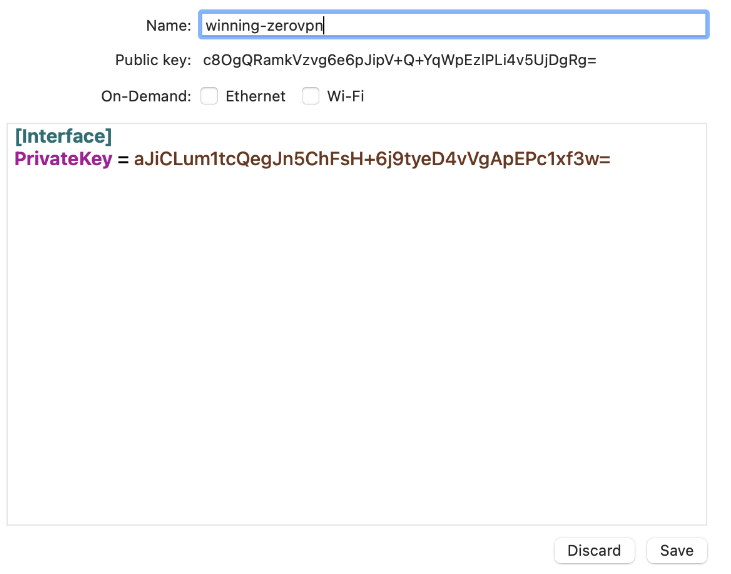
It will open up a form to fill out where you'll have to insert a name for the tunnel. Additionally, you'll need to copy the 'Public Key' (which we'll need later) and save the form.
Now you've to send the Public Key we copied in the last step and send it to the ZeroVPN Network Admin and wait for the ZeroVPN Configuration(A manual operation).
Once the configuration arrives:
- Edit the tunnel we just created by clicking on edit on the bottom right side of the tunnel page
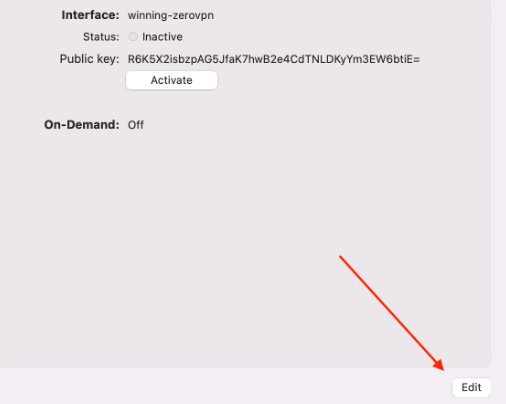
- Add the configuration snippet we received from the ZeroVPN Network Admin at the end of the current configuration and save.
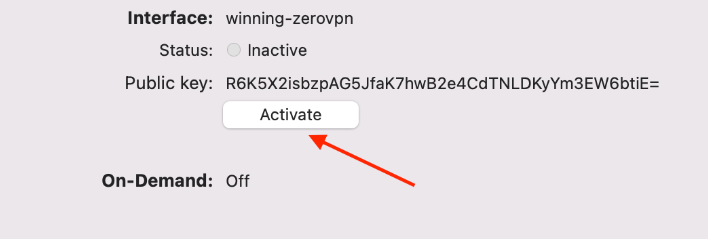
Now we can activate the VPN by clicking on 'Activate' under the tunnel information!
We've succesfully completed the installation of ZeroVPN on our MacOS Client! Congratulation!
If you need assistance, please do not hesitate to contact us!